Elephant Anchor

How to mount TV with elephant anchors?

In this guide, we’ll walk you through the step-by-step process of mounting a TV using Elephant Anchors, highlighting the unique features that make them the perfect choice for your project.

Mounting a TV onto drywall can seem daunting, especially when dealing with heavy screens or uncertain wall conditions. However, Elephant Anchors make the process simple, secure, and reliable. These innovative anchors are designed to handle substantial weight and provide a stable mount on drywall, even without finding studs.

Why Choose Elephant Anchors?

Before diving into the steps, it’s essential to understand what makes Elephant Anchors stand out. Unlike traditional wall anchors, Elephant Anchors are specifically engineered for heavy-duty applications. They offer:

  • Superior Weight Capacity:
    Each anchor can hold up to 50 lbs, making them ideal for mounting TVs up to 200 lbs when using four anchors.

  • Versatility:
    They work seamlessly on drywall, plasterboard, and other hollow walls, even in studless areas.

  • Ease of Installation:
    Designed for DIY projects, these anchors don’t require professional help or complex tools.

  • Reliability:
    Their expansion mechanism ensures a tight and secure fit behind the drywall.

Tools and Materials Needed

Before you begin, gather the following tools and materials:

  1. Elephant Anchors Kit
    Includes anchors, screws, washers, and a titanium drill bit.

  2. Drill
    A cordless drill with variable speeds works best.

  3. Measuring Tape and Level
    For accurate positioning.

  4. Stud Finder (Optional)
    To identify wall areas free of obstructions.

  5. Pencil
    For marking drill points.

Step-by-Step Guide to Mount Your TV

1. Choose the Perfect Spot

Decide on the location for your TV. Make sure it’s at a comfortable viewing height and has access to power outlets. Use a level to ensure the TV mount will be perfectly horizontal.

2. Mark the Drill Points

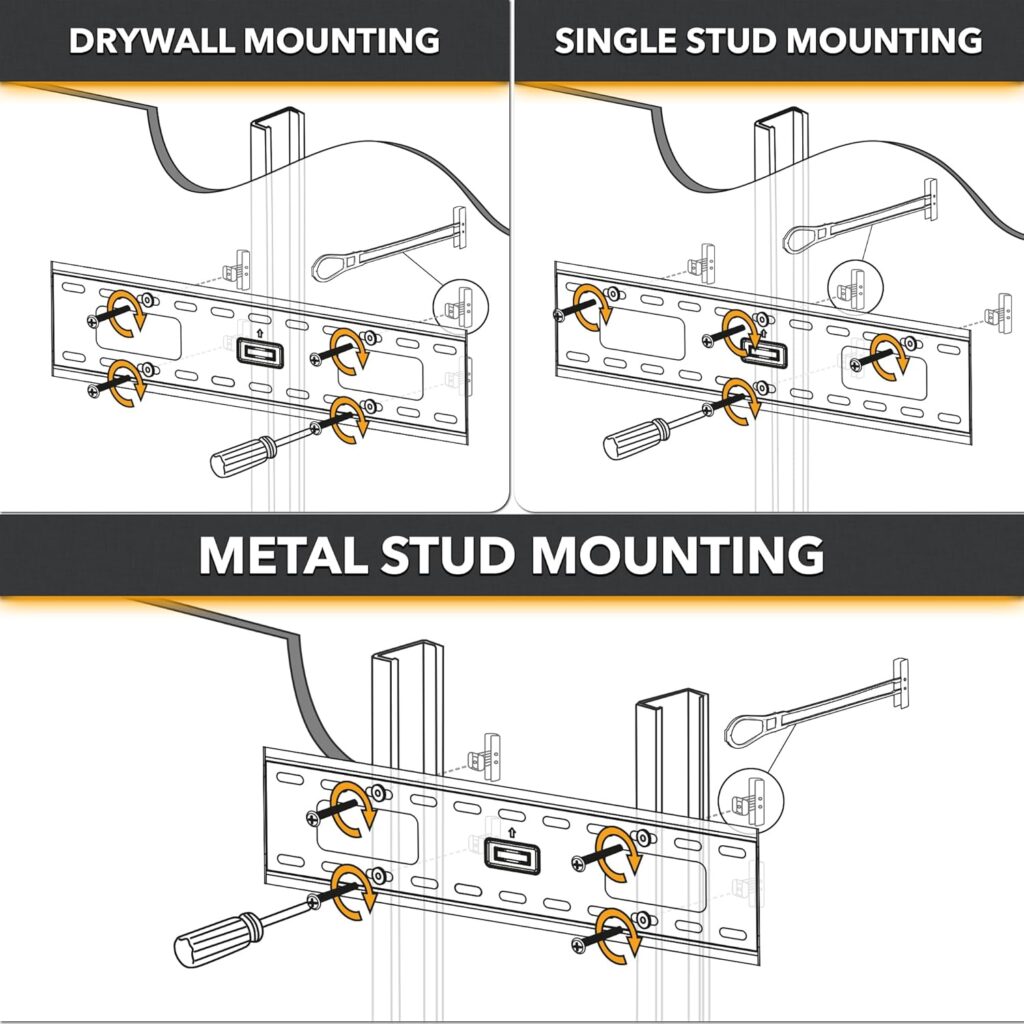
Position your TV mount bracket on the wall and use a pencil to mark the holes for drilling. Most mounts require four anchor points for stability.

3. Drill the Holes

Using the titanium drill bit included in the Elephant Anchors kit, drill holes at the marked points. The holes should be slightly larger than the anchor’s diameter to allow easy insertion.

4. Insert the Elephant Anchors

Push the Elephant Anchors into the drilled holes. Once inserted, lightly tap them with a hammer if needed to ensure they are flush with the wall surface.

5. Expand the Anchors

Begin screwing into the Elephant Anchors using the provided screws. As the screws are tightened, the anchors will expand behind the drywall, creating a secure hold. This expansion redistributes the TV’s weight across a larger surface, preventing wall damage.

6. Attach the TV Mount

Align the mount bracket with the installed anchors and secure it using the screws and washers provided. Double-check that all screws are tightly fastened.

7. Mount the TV

With the help of another person, carefully lift the TV and attach it to the mounted bracket. Ensure it’s securely locked in place.

8. Test for Stability

Gently move the TV to confirm the mount is stable. If you notice any instability, double-check the anchor screws for tightness.

Additional Tips

  • Always use at least four Elephant Anchors to ensure maximum stability for heavier TVs.
  • For larger TVs, position the mount so the weight is evenly distributed across the anchors.
  • Keep cables and wires organized to avoid tangles and improve the overall look of your setup.

Conclusion

Mounting a TV on drywall doesn’t have to be intimidating. With Elephant Anchors, you can achieve a professional-grade installation in minutes. Their strength, ease of use, and reliable design make them the ultimate choice for mounting TVs and other heavy items. Whether you’re a DIY enthusiast or a first-timer, Elephant Anchors have got you covered.

Transform your space with a sleek and secure TV setup using Elephant Anchors. Get started today!


Leave a Reply

Your email address will not be published. Required fields are marked *